How to make an Under Bed Storage Lego Table
Some of the things you will need
- 2 x legs
- 1 x table top in chipboard or solid wood. Mine measures 150cm x 53cm
- 10 x Lego base sets. At R80.00 a piece this is the most expensive part of the table. Shop around, Kiddiwinks was the most reasonably priced. I unfortunately had most of my base sets purchased by the time I came across their shop.
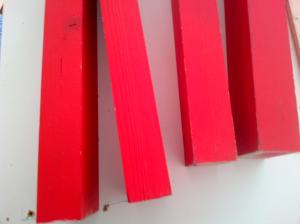
- 4 x cover strips
- white paint.
- panel pins
- nails
- glue
- craft paint roller
- 4 x wheels
Cost average R1000.00 In this post I will be dismantling the very first Lego table I made for my children to make a bigger one. My kids have been complaining since about week one that the table was too small. Along the way the table changed size twice. I was halfway through the first upgrade when I could see even the new one would still be too small and they spent most of their time on the floor instead of their chairs. So I decided to make it lower and inadvertently it turned into an under bed storage Lego table.  This was my first attempt at a bigger table. I added 2 x green Lego base sets. We are dismantling our kitchen in stages and moving it and these are 2 of my cabinet doors which I placed together with the join resting, dead centre, on another wooden beam, a 5 legged table would be an apt description.
  I removed the legs of the first table and used it horizontally this time. The legs and the Lego base plates was about the only things I could salvage from the first table. I turned that table into an art table.
  Before attaching the legs lay your Lego base sets on top of the table and measure from the top how far to all 4 sides it goes. This will serve as your guide when measuring on the underside of your table where to place the legs. Once you have the measurements flip the table over and do the exact same measurements on the other side.
  The same measurements you have on the front should now be a guide for where you can place the legs as you will be attaching it with nails from the top. Mark your measurements for the legs with a pencil and draw a heavy line along all 4 sides of the legs making sure its centered. Place the legs under the table horizontally, line it up with the heavy pencil marks you made earlier. Place some cold glue between the table top and the legs and attach it from the top with 3 – 4 nails as well. Make sure you keep to the insides of you earlier pencil markings otherwise the nails will be visible from the top if your Lego base plates do not cover the whole table. The center is the other 2 legs and a 30cm piece of the board left over since it comes in standard sizes of 1.8cm x 53cm. Attach the board on top of the legs and it will serve as an extra shelf for bigger pieces.
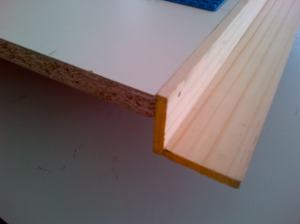
  Now with the legs attached flip it right side up and set aside for 1 day for the cold glue to dry. Grab the cover strips and measure the long side of the table and cut the cover strips to size. You will need 6 strips of the same length, 3 on each side.
  Using a combination of cold glue and nails attach 2 strips together x 2.
  Attach the 2 combined cover strips on each side of the table again using a combination of cold glue and nails.
  Attach the last cover strip again using a combination of cold glue and nails. This will replace the plastic containers which was attached under the table of the first Lego table I made. Having removable storage meant the containers always ended up on the floor whereas this way the lego pieces is within easy reach and the storage is not removable.
  Measure the sides of the table and measure and cut the last 2 cover strips to size to close off the ends of the storage “gutters”. Alternatively you can put 2 storage gutters on the end parts as well. Paint the cover strips white and cold glue the Lego base plates to the top of the table and let it dry overnight. Turn the table over and attach the wheels following the manufacturers instructions.
  My kids started playing before I could paint the storage gutters and attach the wheels. Even without the wheels it moves easily in and out from under the bed. Don’t forget to lay the higher Lego constructions, that won’t fit under the bed, down flat before storing it away.
  They store finished pieces, they do not play with often, on a shelf right next to the table lest the Lego table table gets too big.


I think that is an motivating point, it made me think a bit. Thank you for sparking my thinking cap. Sometimes I get so much in a rut that I just sense like a record.
Interesting point of view. What are your thoughts on expansion on a global scale? Sometimes people get a little upset with global expansion. Ill check back to see what you have to say.
New Oakley Juliet
I always was concerned in this subject and stock still am, regards for posting .
Ray Ban 3445 Baratas
Hey! Just wanted to say great site. Keep up the good work!
Oakley Moto
I actually appreciate this post. I¡¦ve been searching everywhere for this! Thank goodness I located it on Bing. You’ve created my day! Thanks again
[…] back in their room with all their Lego that doesn’t fit on their Lego table on […]
In this excellent style of things you’ll receive an A just for effort. Where you really confused us was inside your facts. You know, they say, details make or break the argument.. And it couldn’t be far more accurate here. Having said that, let me reveal to you just what exactly did deliver the results. The writing can be pretty persuasive and that is possibly the reason why I am taking the effort to comment. I do not make it a regular habit of performing that. Second, although I can easily notice the jumps in logic you make, I am certainly not convinced of just how you appear to connect your ideas that produce the actual conclusion. For correct now I will subscribe to your position even so wish inside the near future you truly connect your dots significantly far better.
Opticalia Ray Ban [url=http://drstephaniesmith.com/Ray-Ban-Online-Eyegafas.php?pid=1557]Opticalia Ray Ban[/url]